
Look around your current space and an immediate stand-out feature will be at least one screen displaying 2D information. Perhaps your space is tidier than mine, but in front of me I can see several laptops, monitors, a CRT oscilloscope, an ammeter, a temperature readout on a soldering iron, and many more. if I wanted to make a compelling virtual reproduction of my space then I am going to need sophisticated methods to render and simulate these components. The Virtalis Reach Canvas is our answer to this demand.
Authors of content for the web faced another problem, the existing frameworks for web pages were well known and established, but quite restrictive, so how could they add on compelling interactive 2D graphics? The answer was the HTML5 Canvas component. If technology had been more capable when the web started, then the HTML5 Canvas might have come first.
The Virtalis Reach Canvas feature is a bridge allowing HTML5 Canvases to become part of collaborative WebXR experiences. By doing so all the power of the HTML5 Canvas is available to create the 2D content that exists naturally in a realistic 3D space. A massive, and deliberate, side-benefit of that is that many, many more of the browsers API’s can also then be integrated, opening the door to embedded video, audio, sensors and geolocation, and much more.
There’s code here
In this blog series I shall be covering how to wield the Canvas practically, so you can get quick results and hopefully get over the “how to start” hurdle which is so often present with new product features. There will be plenty of code snippets but don’t be afraid!
I recommend you refer to our online Canvas documentation here as needed for more information.
I will also be using Visionary Render, however this is not a pre-requisite. It is possible to develop for the Virtalis Reach Canvas using Virtalis Reach alone, or other Virtalis software, and that may be the topic of a future post.
Off we go
To start, let’s create and publish the most basic visualisation we can containing a canvas, it’s very easy. First, fire up Visionary Render and start a new scene. We will be using a Lua script macro to automate the Visionary Render user interface so paste the following code into the Scripting Editor and execute it.
Now Expand the Developer tree and then Fly to the node Scenes / Canvas / Proxy.
The result will look like this:
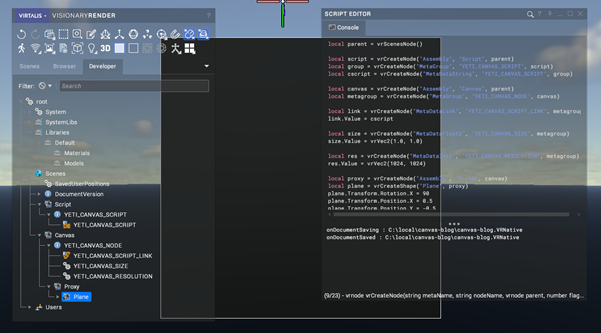
Let’s save our progress as canvas-blog.VRNative.
So now we have the very basic framework, we have some special data nodes that Virtalis Reach will know how to translate into a Canvas when published to a web browser, and we also have a proxy visual, a plane, so we can know the location and size of the canvas in the virtual environment.
What’s missing now is some JavaScript code to render the canvas.
Select the Developer tree and select the node Scenes / Script / YETI_CANVAS_SCRIPT / YETI_CANVAS_SCRIPT – this string will contain the JavaScript code for the canvas. Paste the following code into the string value
The last thing to do before we upload this is to hide the Proxy plane, we don’t need it in the Virtalis Reach scene, its purpose is to help us understand the size and position of the canvas in Visionary Render. if we don’t hide it then we will see it rendered at the same location as the canvas. Even if we forget then the plane can still be hidden with Virtalis Reach’s Product Tree.
Now we can save the VRNative document and upload it to Virtalis Reach. Please refer to the Virtalis Reach documentation if you are unclear on that.
To follow along you should upload your asset, create a project to publish it and set that project to publish automatically when the data changes. That way we can experiment with this VRNative, upload the changes, and then view the updated version of the visualisation as soon as the server has processed it.
Be sure also to configure the project to Allow Scripts. The power to run scripts in user’s web browsers and as part of the virtual environment on a Virtalis Reach server requires great responsibility and consideration. For that reason, the server administrator is required to specifically authorise those publishers who will use scripts.
The visualisation when viewed in Virtalis Reach will look like this:
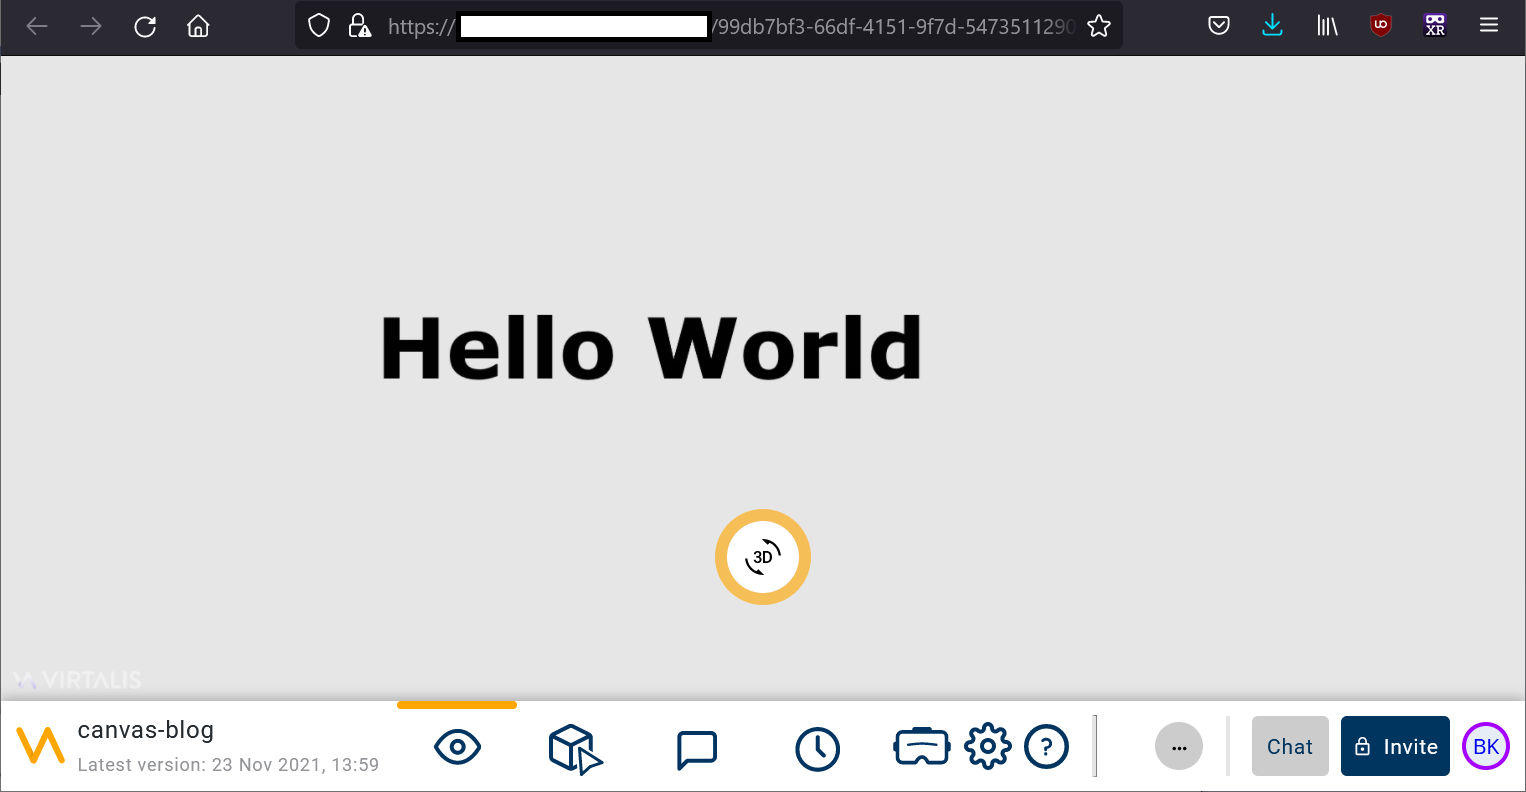
Isn’t that neat? the 2D content is now a panel in the 3D world. We can look at it from any angle, it is drawn with perspective, and it will be composed with and occluded by 3D geometry.
Experimenting with HTML5 Canvas code
Now that we can see how our 2D content will appear in the XR experience, then let’s start exploring what the HTML5 Canvas can do. We don’t really need the canvas to be rendered as 3D for this so instead let’s use a freely available web development tool, JSFiddle, as a sandbox.
Browse to https://jsfiddle.net/ , then enter this HTML code into the HTML pane:
And enter this JavaScript code into the JavaScript pane:
Press run and the output will look like this:
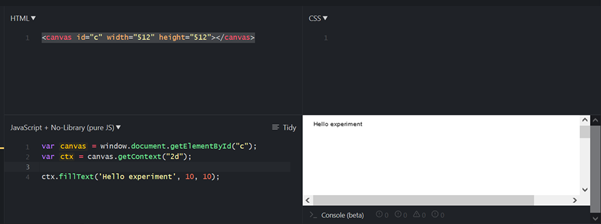
You can see how similar the code here is to the code we used previously. The main difference is that in Virtalis Reach the API passes to the code the Canvas Context to perform the rendering on, whereas here we must retrieve it from the web page’s HTML.
That minor difference aside we can now use this sandbox to try some of the other features of the Canvas.
Drawing an image in JSFiddle
Rendering an image rather than text is quite simple using the Image class. Change the JavaScript code that renders the Canvas in JSFiddle to this:
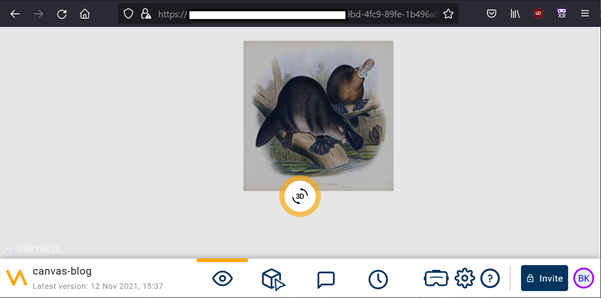
Run it, and here’s how it looks:
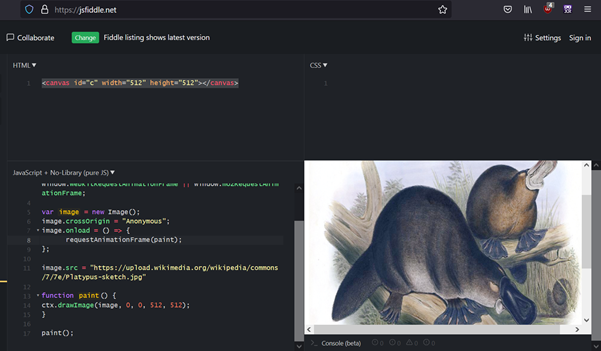
The code has grown a little now. If it’s hard to see what is happening, then it might be worth diving into some of the many JavaScript canvas tutorials that are about on the web. Find some code that is interesting and then paste it in.
Drawing an image in Virtalis Reach
Here is the same code when transformed to run with Virtalis Reach.
And here is how it looks in Virtalis Reach:
You can see that the code is very similar. Most obviously different is that the calls to <inline-code>requestAnimationFrame<inline-code> instead call <inline-code>dirty<inline-code>, that is used to instruct the Virtalis Reach web viewer that the canvas needs to be repainted. More curious is the introduction of the <inline-code>localContext<inline-code> variable.
To understand that, imagine that you have decided to simulate a factory floor. There are many identical machines on the floor, each with its own display and control bank. Although the machines are all the same, they are not performing the same action at any time, each has a different local state.
The Virtalis Reach Canvas API allows a single set of JavaScript methods to render many different instances of Canvases. In this way you can have the kernel of code for the display reused many times, the <inline-code>localContext<inline-code> variable acts as a container for the per instance local state.
Depending on your experience level with JavaScript a little thing that can catch you out is missing the comma after the closing brace of <inline-code>init<inline-code>, without this then a list of functions has not been passed and the syntax is incorrect!
When scripting errors happen whilst viewing a published visualisation then an error toast message will be displayed. You can get more information by opening the web browser’s built-in developer tools.
Clicking on the image
Static images, text and graphics are extremely useful but many 2D systems are interactive. Virtalis Reach enables canvases to receive mouse input as if the mouse acting on the 3D view were able to act on the 2D content within it. Very soon it will also be possible to use immersive hand controllers in a similar fashion.
Let’s add a mouse click event handler to the code.
When that is published, click on the canvas and it will look like this:
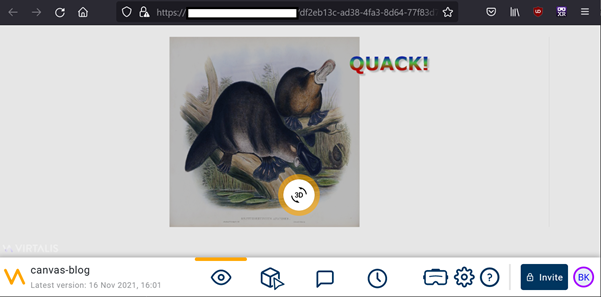
Very good, we now have an interactive platypus!
The <inline-code>onMouse<inline-code> event handler is what we have used to respond to the mouse. In this example the code checks whether the event is of interest, and if it is, then it sets some member variables on the <inline-code>localContext<inline-code> and then calls <inline-code>dirty<inline-code> to tell the framework to redraw the canvas with the updated state. I made the text a bit fancy too by using JSFiddle to prototype some effects until I achieved what was needed.
Making buttons
By combining rendering images and graphics with handling mouse events we can see how it is possible to build widgets for 2D graphical user interfaces.
We are going to make big jump ahead now and create a simple GUI.
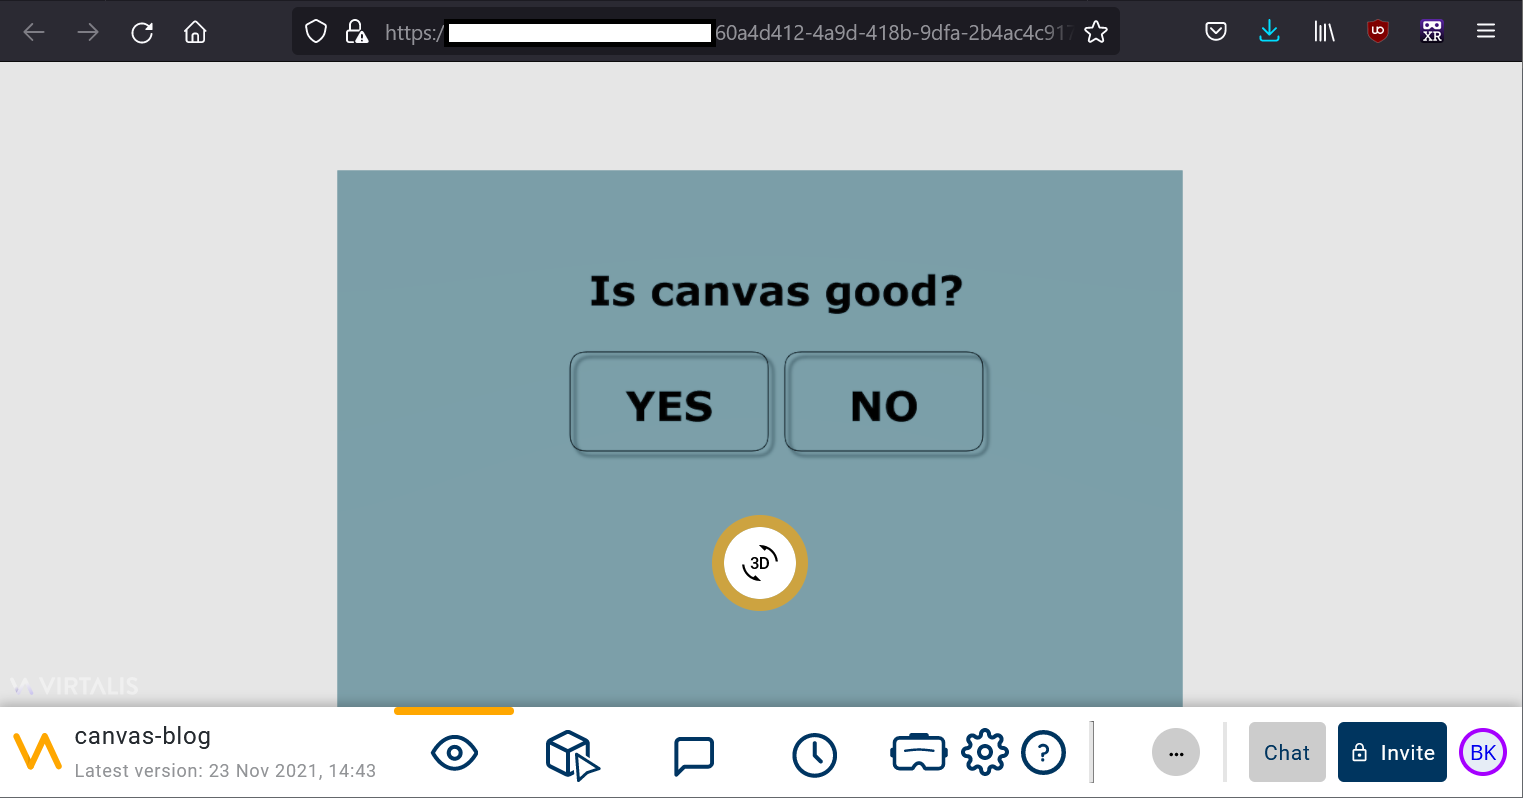
There is a lot more code here but don’t be intimidated, have a read of it, and then afterwards I am going to delve into the details.
Starting at the top is the <inline-code>drawButton<inline-code> function, essentially it draws a rounded rectangle with a drop shadow, and then the button's caption. First there's some arithmetic to get the size, shape, and coordinates of the corners, and then straight into the 2D rendering instructions. I have used a JavaScript object to hold the button properties, that data structure is used throughout this script and keeps it tidy. The outcome is that when the button is not pressed it is drawn as a border with a shadow, and when it is pressed then the frame is moved to where the shadow was, and the shadow is removed. This gives the impression of a change of depth. <inline-code>drawButton<inline-code> could have as easily been written to switch between a two pre-generated button images but being the programming type, I chose to do it procedurally instead. A cheeky hack was used to get a reasonable height estimate for the caption text so it can be centred in the button. The HTML5 Canvas API measureText method is used to fetch the width of the character 'M' because, of course, M is an approximately square character, as tall as it is wide!
Next is <inline-code>hitTestButton<inline-code>, this function tests whether a coordinate is within a single button's region, and after that is <inline-code>hitTest<inline-code> which tests an array of buttons.
The now familiar <inline-code>init<inline-code> follows, here are the data definitions of the buttons, along with an additional <inline-code>localContext<inline-code> variable to keep track of which button is pressed. There is a little more arithmetic here so that the buttons are centred in the canvas.
Then is <inline-code>paint<inline-code> which fills in the canvas background and draws each button.
Finally, is <inline-code>onMouse<inline-code>, it might take a second or two to unwrap the logic here. First the mouse button associated with the event is tested, then <inline-code>hitTest<inline-code> determines which button was clicked on, if any. Next the type of the event is used to set or clear the pressed state of the button. And then, at last, in the <inline-code>mouseup<inline-code> branch, if the mouse was on a button then the handler for that button is called. In this case both buttons do the same thing which is to set the caption of the label above them. At the very end, <inline-code>dirty<inline-code> is called because the canvas needs repainting to show the updated state of the buttons and label.
Using the Scripting Interop
Just as the content of a 2D canvas is often not static, neither is it isolated from its environment. The interface panels for our simulated machines on our simulated factory floor would be quite limited if they couldn’t make the machines do anything.
In Virtalis Reach the shared, virtual environment can be manipulated using Lua scripts, and these Lua scripts can be invoked from our Canvas scripts. To enable a script to be invoked from the Canvas script it’s function name must be prefixed with <inline-code>__webcall_<inline-code>.
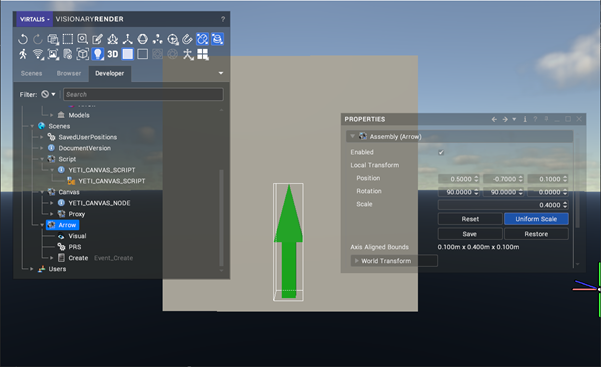
Using Visionary Render let’s add an arrow near to the canvas. Right click on the Scenes node in the Developer tree and choose Create / Geometric Shape / Arrow.
Select the Arrow which has been created and change its Position, Rotation and Scale to <inline-code>(0.5, -0.7, 0.1), (90, 90, 0), 0.4<inline-code> which will locate it in front of the Canvas plane, then change its material colour to something obvious. It should come out looking like this:
Next create a <inline-code>Create<inline-code> event on the arrow, we will use this to compile the Lua code we want to execute. Add the following code to the <inline-code>Create<inline-code> event.
What this is does is capture <inline-code>__Self<inline-code> which is a Lua script reference to the node the <inline-code>Create<inline-code> event is attached to, the Arrow node. It then defines a function which points the arrow at a particular angle by manipulating the arrow's <inline-code>Transform<inline-code> property.
Now we can change the Canvas code to call this Lua function and make our 2D buttons control the 3D visualisation.
Changing the button captions is trivial, the crucial code change is in the <inline-code>onMouse<inline-code> function. As well as setting the label caption there is now a call to <inline-code>sendLuaFunc<inline-code> to invoke the Lua function to point the arrow.
An important feature to note is that parameters are passed from the JavaScript code to the Lua function in a JavaScript array, don’t forget the squared braces!
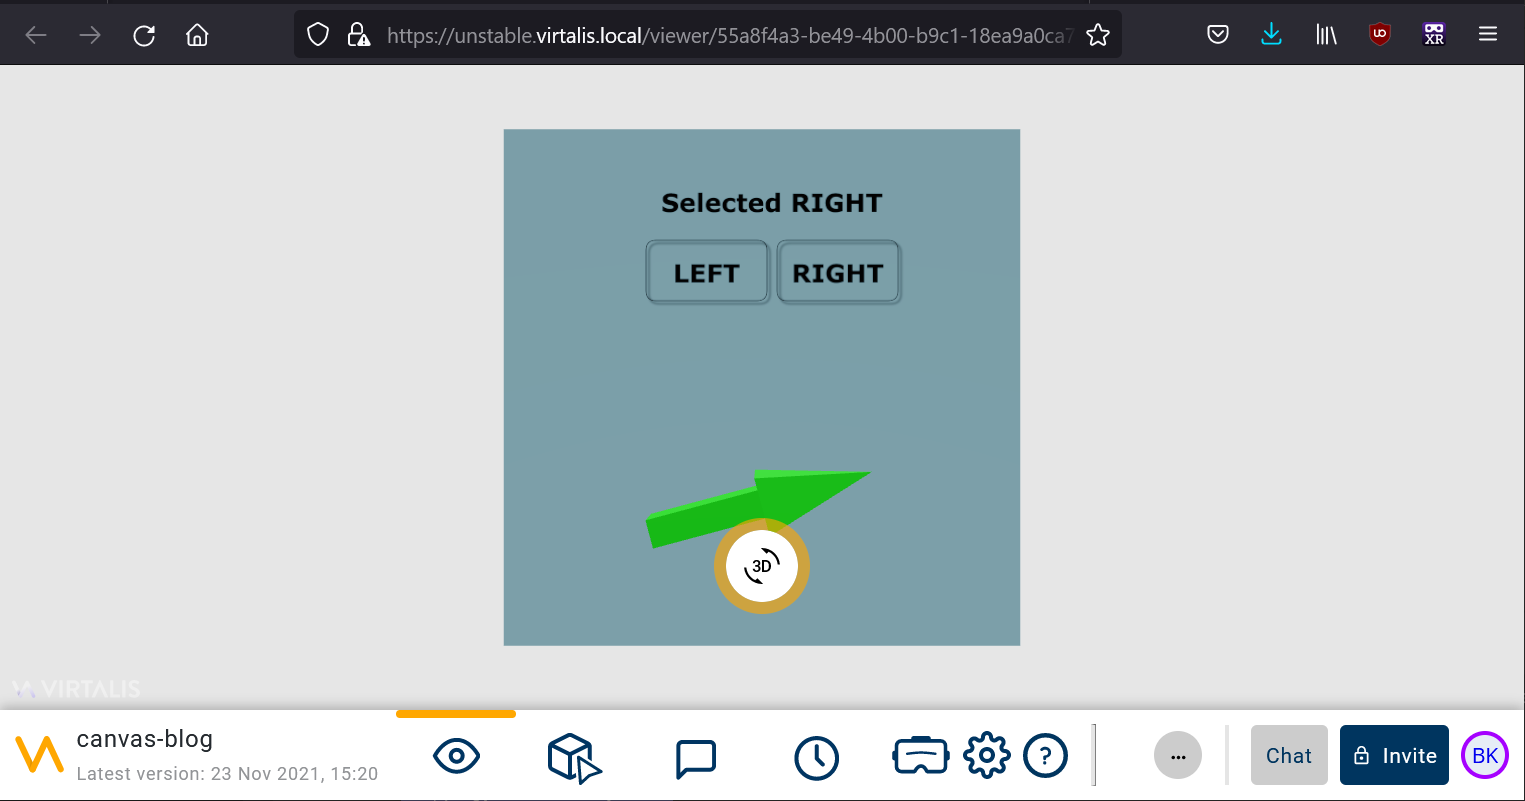
The result looks like this when published to Virtalis Reach. Pressing the buttons points the arrow in the appropriate direction and our little script is now able to break out and influence the virtual world.
Making the buttons trigger animations
It’s a small step to upgrade our script so that an animation sequence changes our arrow’s transform instead of it being directly manipulated.
In Visionary Render we’ll use the animation editor to add an animation sequence consisting of two frames to the arrow. The <inline-code>__webcall_PointArrow<inline-code> function in the <inline-code>Create<inline-code> event script can then be extended to manipulate these and trigger the sequence.
Here’s the updated code for the Create event script.
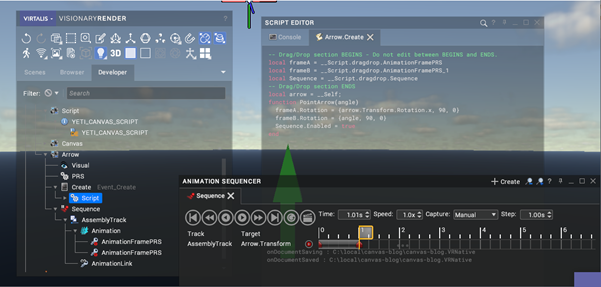
To build this, after making the sequence I used Visionary Render’s developer tree to drag and drop the two animation frame nodes and the Sequence node into the Script Editor, and then updated the code. The most important addition to the Lua script is setting the sequence’s Enabled property to true, this runs the sequence to smoothly animate the arrow.
Here’s how it looked in Visionary Render.
We don’t need to change the Canvas code at all, since this time only the 3D scene data has changed.
After publishing to Virtalis Reach a static picture of the visualisation looks no different to the previous version, but now when the buttons are pressed the arrow smoothly animates between its final rotations.
The eagle-eyed reader might notice that the script in the Visionary Render screenshot is subtly different to the code in the text above. Like all human programmers I made a little bug the first time I made this. Mathematicians will probably flinch at the use of Euler angles to represent 3D rotations, I had ignored that setting a rotation to a certain triplet of Euler angles does not always mean that the same Euler triplet will be retrieved from an object’s transformation afterwards. Nobody’s perfect and thankfully computer code is easily fixed!
Making it work in Collaboration
Everything is looking good but there is another subtle bug in what we have made, depending on our use-case this may or may not be an issue.
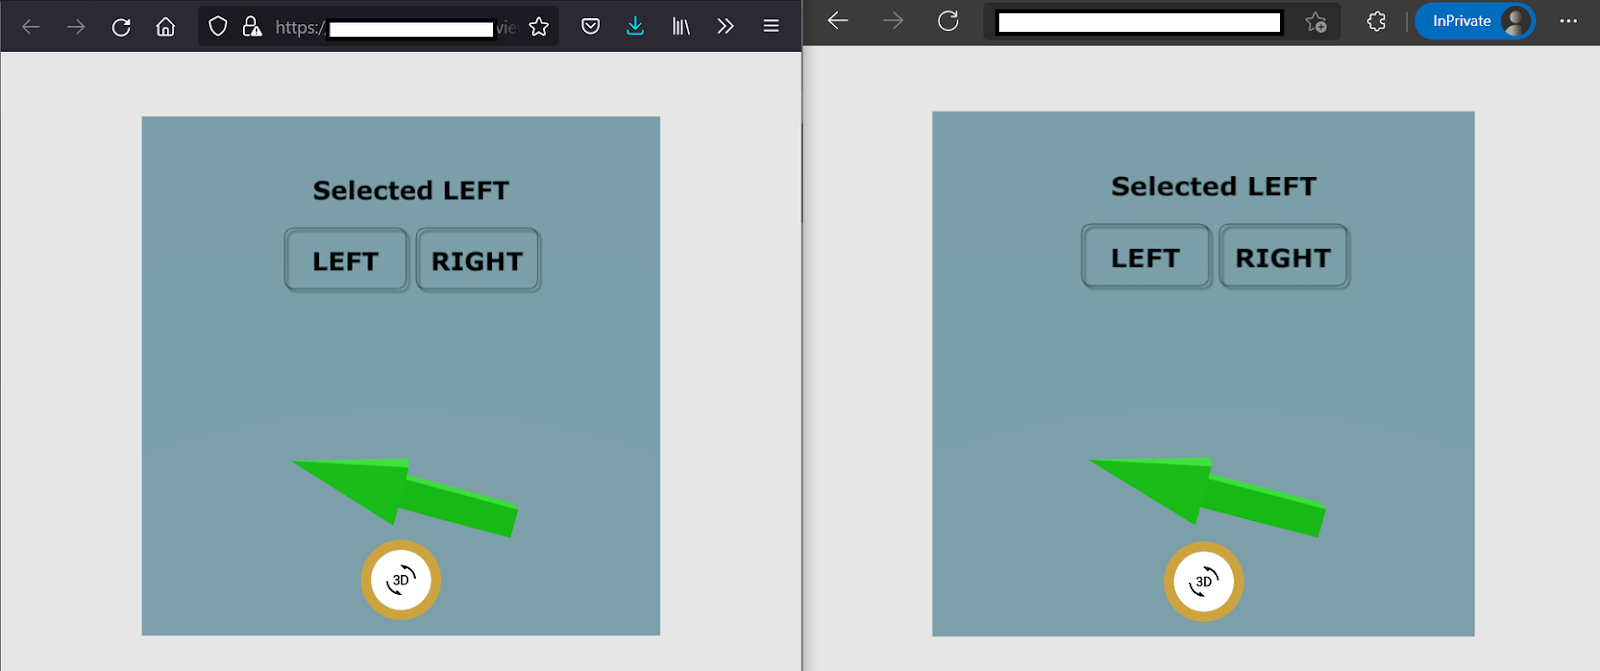
To illustrate the problem, we need to share our visualisation session and view it in collaboration. I collaborated with myself by opening a second browser tab because everyone else is really busy…
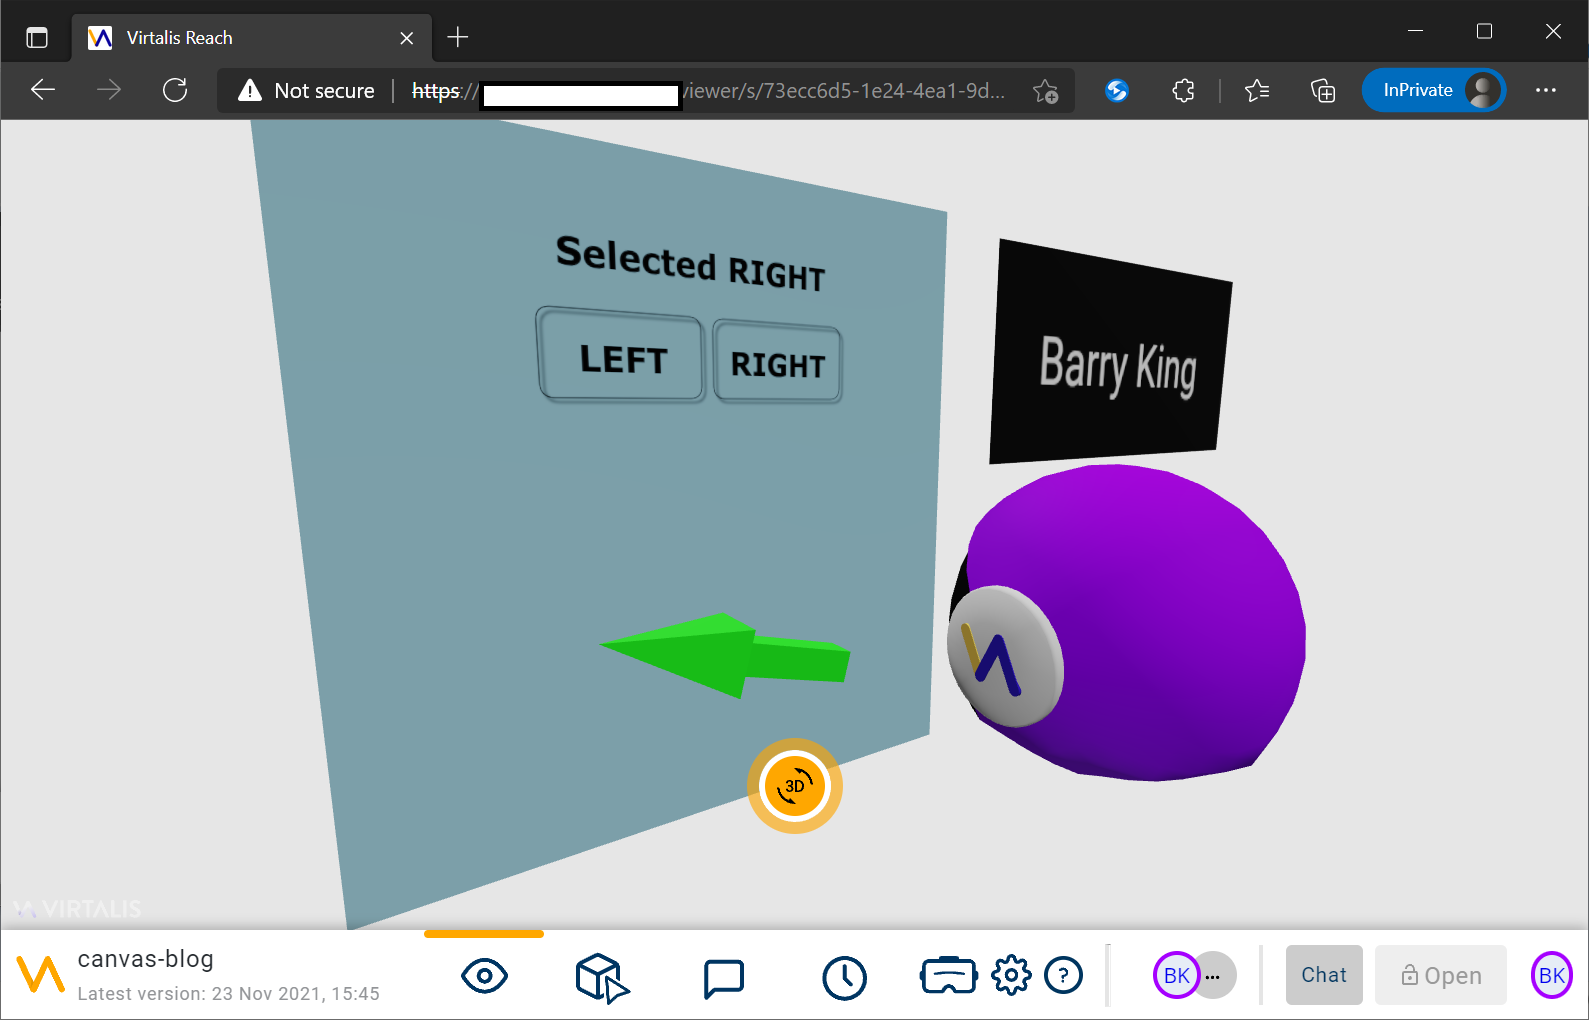
Woah, there’s virtual me, but something’s not right!
The message says, “Selected RIGHT”, but the arrow is pointing left. What’s gone wrong?
What occurred was that in my second browser tab after I joined the collaborative session I pressed RIGHT, the arrow swung to the right and the message was updated in my second browser tab. Then in my first browser tab I pressed LEFT, and the arrow swung to the left and the label text was updated in my first browser tab.
The problem is that the Label’s message is not synchronised between the collaborating users. This behaviour could be used intentionally, perhaps each user should have their own individual canvases in some scenarios. However here it is wrong.
To solve the issue, we need a way to share state between Canvases in a collaborative session and this is implemented using the Canvas’s <inline-code>serverCanvasProperties<inline-code> object.
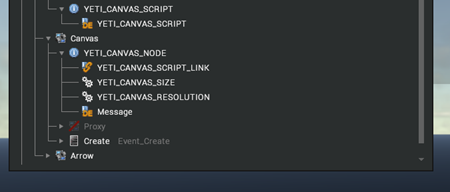
Right back at the start we defined our Canvas using specially crafted <inline-code>MetaData<inline-code> nodes parented to a MetaGroup container called <inline-code>YETI_CANVAS_NODE<inline-code>. As well as configuring Virtalis Reach this container can also be used to pass user data to the Canvas.
We can add our own data using other <inline-code>MetaData<inline-code> nodes, so let’s add a MetaDataString node and call it Message:
This extra data is passed to all our JavaScript callbacks through the <inline-code>serverCanvasProperties<inline-code> parameter, but the most effective place to utilities it is in the <inline-code>DataChanged<inline-code> callback which is called whenever the Canvas meta data changes.
Here’s the new handler code to add at the bottom of the Canvas JavaScript:
It copies the value of the <inline-code>Message<inline-code> MetaData value into the caption of our label, and then requests that the Canvas is repainted.
The last step then is to set that value so that the caption stays synchronised in the collaboration. We do that by using another Lua function which sets the <inline-code>MetaDataString<inline-code> value. It can be tricky to keep in mind what's happening so let's recap the chain of operations that will happen:
1. The message value is passed as a parameter from the Canvas code to a Lua function.
2. The Lua function sets the parameter as the value of the Message MetaDataString node.
3. The change to the <inline-code>Message<inline-code> <inline-code>MetaDataString<inline-code> node is sent to all the Canvases.
4. The <inline-code>DataChanged<inline-code> handler is called in response to the change.
5. The code in <inline-code>DataChanged<inline-code> updates the Canvas JavaScript state and draws the canvas with the updated message.
Like the previous Lua function we needed, we’ll define this new one in a <inline-code>Create<inline-code> event handler script, this time on the Canvas Assembly node.
Here’s the <inline-code>Create<inline-code> event handler script code:
Again, using the Developer tree I used drag and drop to reference the <inline-code>Message<inline-code> <inline-code>MetaDataString<inline-code> node from the script. You can see that all this Lua function does is copy the function parameter to the node's Value property.
Lastly, we need to add a call to <inline-code>sendLuaFunc<inline-code> when we want to set the message, like this:
That is all that is needed to keep the chain of execution flowing. The cunning bit is that now no matter how many viewers are in a collaboration they all will see that same change, so they will all stay synchronised.
And here is the result:
No matter which collaborating user presses the buttons, the label shows the correct message and the arrow points in the correct direction. In many cases it would make sense also to synchronise the button pressed state so the users can see each other pressing the buttons, that would then complete the illusion that there is one GUI in the virtual world.
Going beyond Canvas rendering
Having read this far you might think that we have exposed a lot of the potential functionality that can be exploited using the Virtalis Reach Canvas API, actually we have barely scratched the surface. This is because by enabling Virtalis Reach visualisations to access the JavaScript execution environment within the viewers web-browser, we have opened the door for those visualisations to access a vast ecosystem of browser-based APIs. The list is here https://developer.mozilla.org/en-US/docs/Web/API
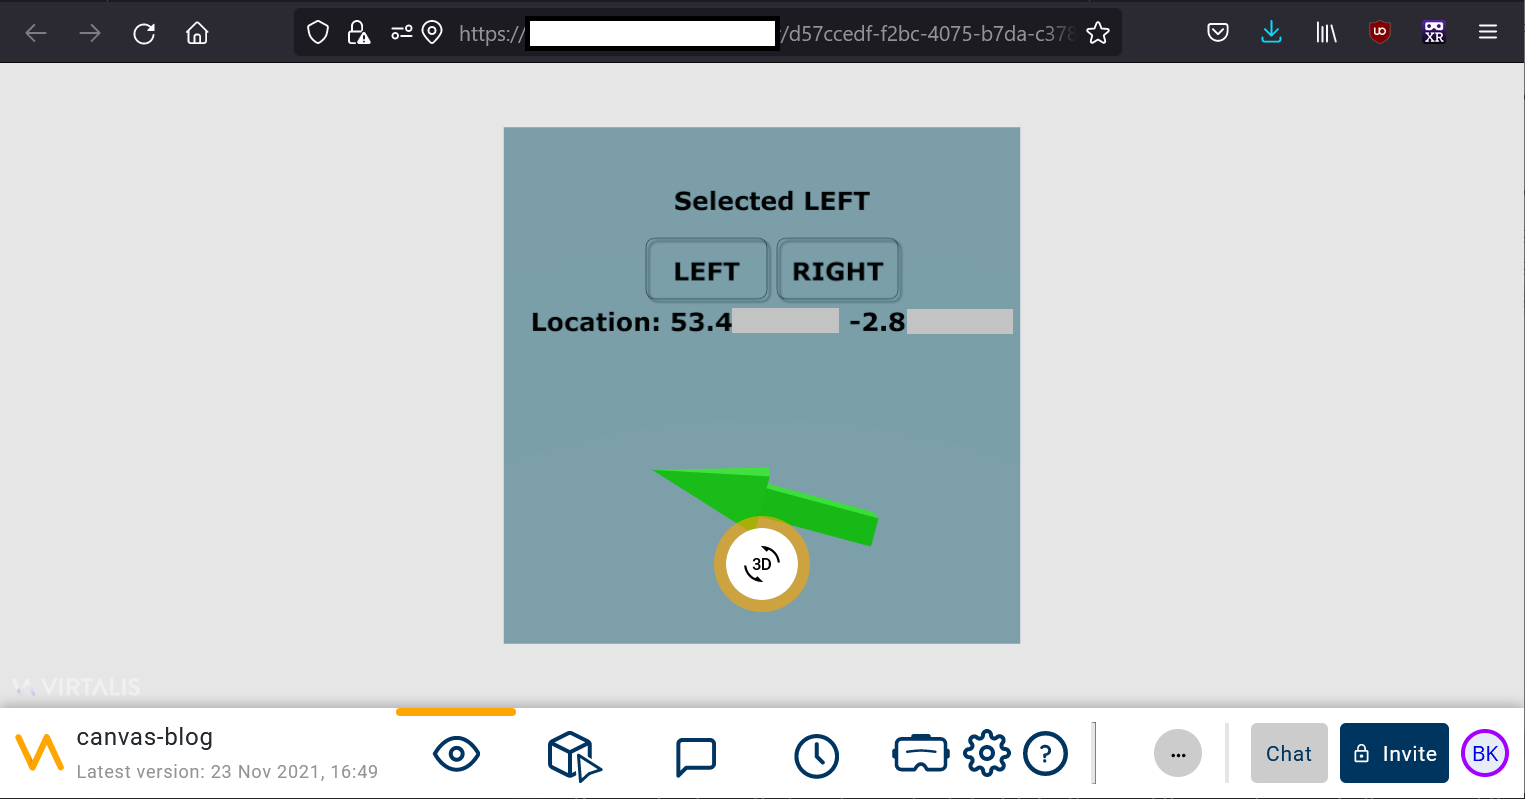
As a quick taster, let’s add support for the Geolocation API.
Here’s the extra code to append to the Canvas’s JavaScript:
I added an extra label too. and here’s how it looks in Virtalis Reach:
The end, or the end of the beginning?
Thank you for following with me on this journey into Virtalis’s exciting new feature. I very much look forward to seeing your creations and working with you on our new features.
I hope soon also you will be able to join me again to share in more explorations here in the Developer’s Blog.
I would also like to take this moment to acknowledge the fantastic work of our Software Development teams for making this a reality.